
Progress Reports on Demand (PRoD) 🔗
Creating and Sending Progress Reports
Within Dropout Detective and Grade Guardian, Progress Reports on Demand will enable users to bulk download progress reports, and administrators will be able to schedule and send PDF progress reports to students and parents.
Key Steps
1. Understanding Progress Reports 0:11
- A progress report displays a student's grades, missing assignments, and zeros.
- Accessible by clicking on a student's profile card and using the print icon.
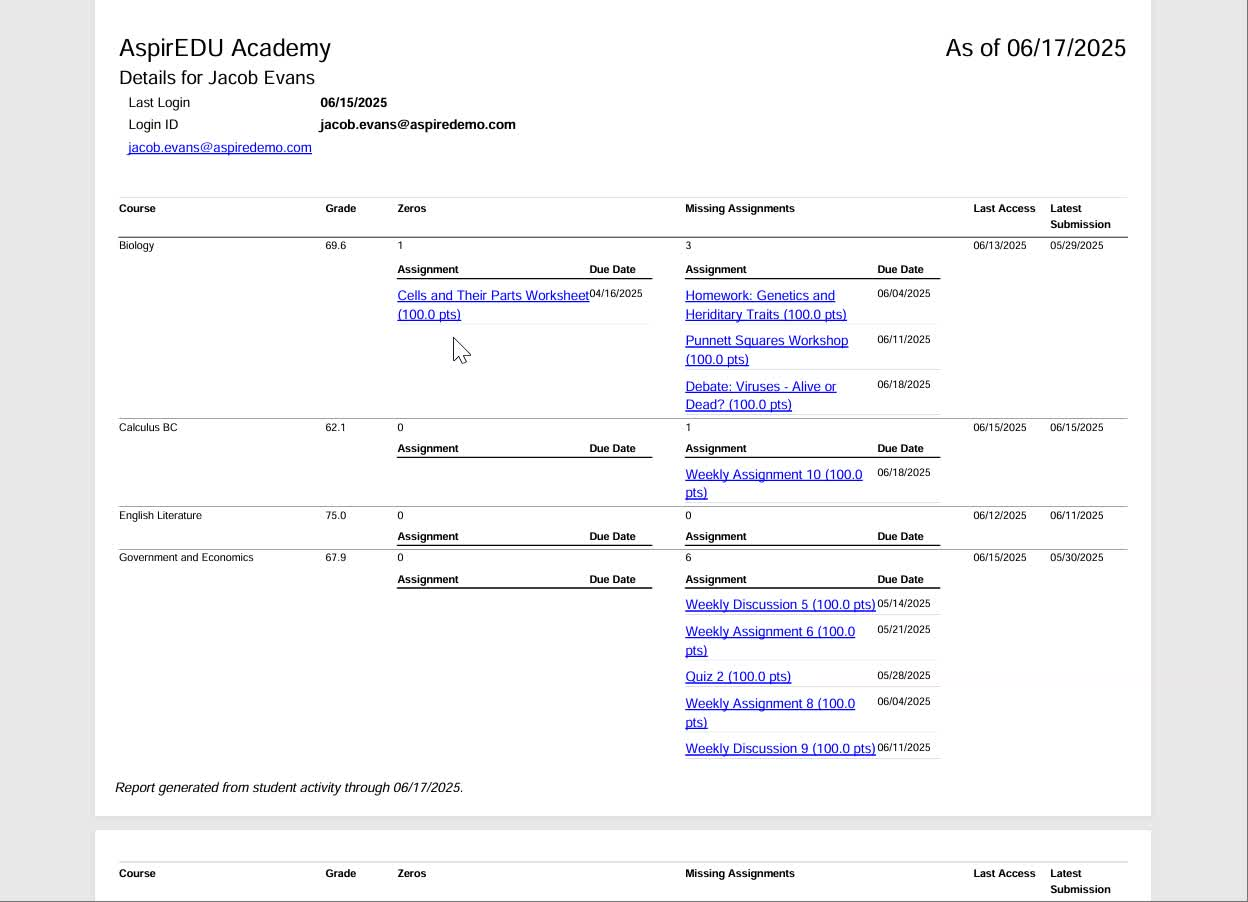
2. Downloading Bulk Progress Reports 0:43
- Navigate to the main page of Grade Guardian or Dropout Detective.
- Click on the 'Download Reports' option in the top right.
- Select the dashboard or class to download reports for all students or specific students.
3. Filtering Students for Reports 1:39
- Choose a specific dashboard (e.g., ninth grade).
- Apply filters to select students (e.g., high risk, D or F grades).
- Only the progress reports of selected students will be included in the download.
4. Accessing the Reports Area 2:10
- Go to the reports area as a dashboard viewer, ally, or faculty member.
- Select the 'Bulk Progress Report' option and apply filters and date selections.
5. Preparing to Send Progress Reports 3:05 (Admins only)
- Please make sure IT enables DKIM and DMARC records in your DNS for email sending.
- Fill out the Microsoft form for the email message accompanying the reports.
6. Sending Progress Reports 4:13
- Access the Progress Reports tab in the Settings menu (available to Access Manager admins).
- Choose to send reports immediately or schedule them for later.
7. Scheduling Progress Reports 5:13
- Select recipients (students or students and observers).
- Choose the data from date and the send date for scheduled reports.
8. Managing Scheduled Reports 6:14
- View scheduled reports in the periodic progress report list.
- Use the action column to delete scheduled reports or download recipient lists.
Cautionary Notes
- Ensure that all IT configurations are completed before attempting to send reports.
- Double-check recipient lists to avoid sending reports to unintended recipients.
Tips for Efficiency
- Use filters to narrow down the list of students for bulk reports to save time.
- Schedule reports in advance to automate the sending process and reduce manual work.
Need Help? Reach out to support@aspiredu.com.