
How to apply Tags 🔗
Using Tags for Student Notes in Grade Guardian and Dropout Detective
Key Steps
Step 1: Access Student Notes 0:10
- Navigate to the notes section for a specific student (e.g., Michael Bimes).
Step 2: Create a Note 0:24
- Write a simple note regarding the student’s needs (e.g., 'Michael Bimes is struggling and needs extra help').
Step 3: Assign Tags 0:38
- Click to assign a tag to the note.
- Note that tags are created by your access manager add-on, and may vary for each user.
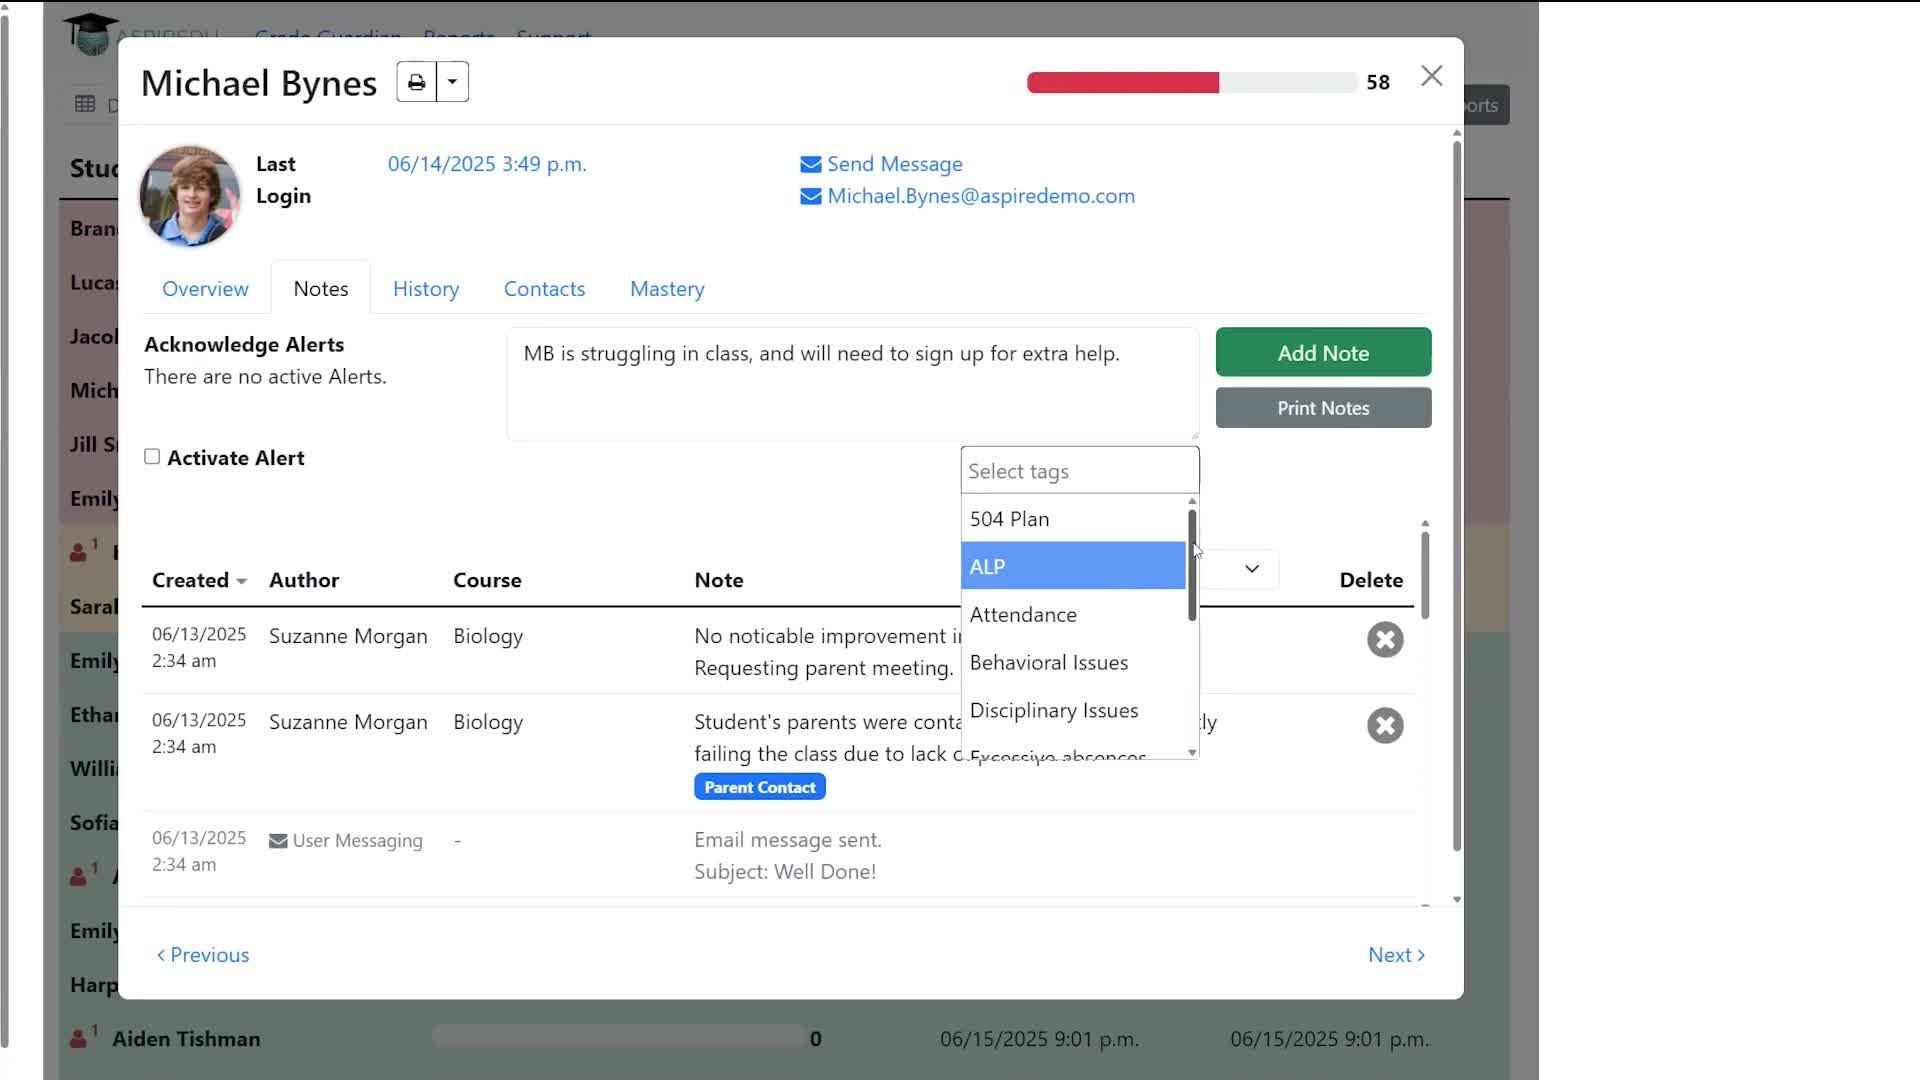
Step 4: Request New Tags if Needed 0:49
- If you need a missing tag, contact your access manager admin to create it.
Step 5: Add Multiple Tags 1:04
- You can assign multiple tags to a note (e.g., 'Study Hall', 'Parent Meeting Needed').
Step 6: Save the Note 1:17
- Click 'Add Note' to save your note along with the assigned tags.
Step 7: Filter Notes by Tag 1:28
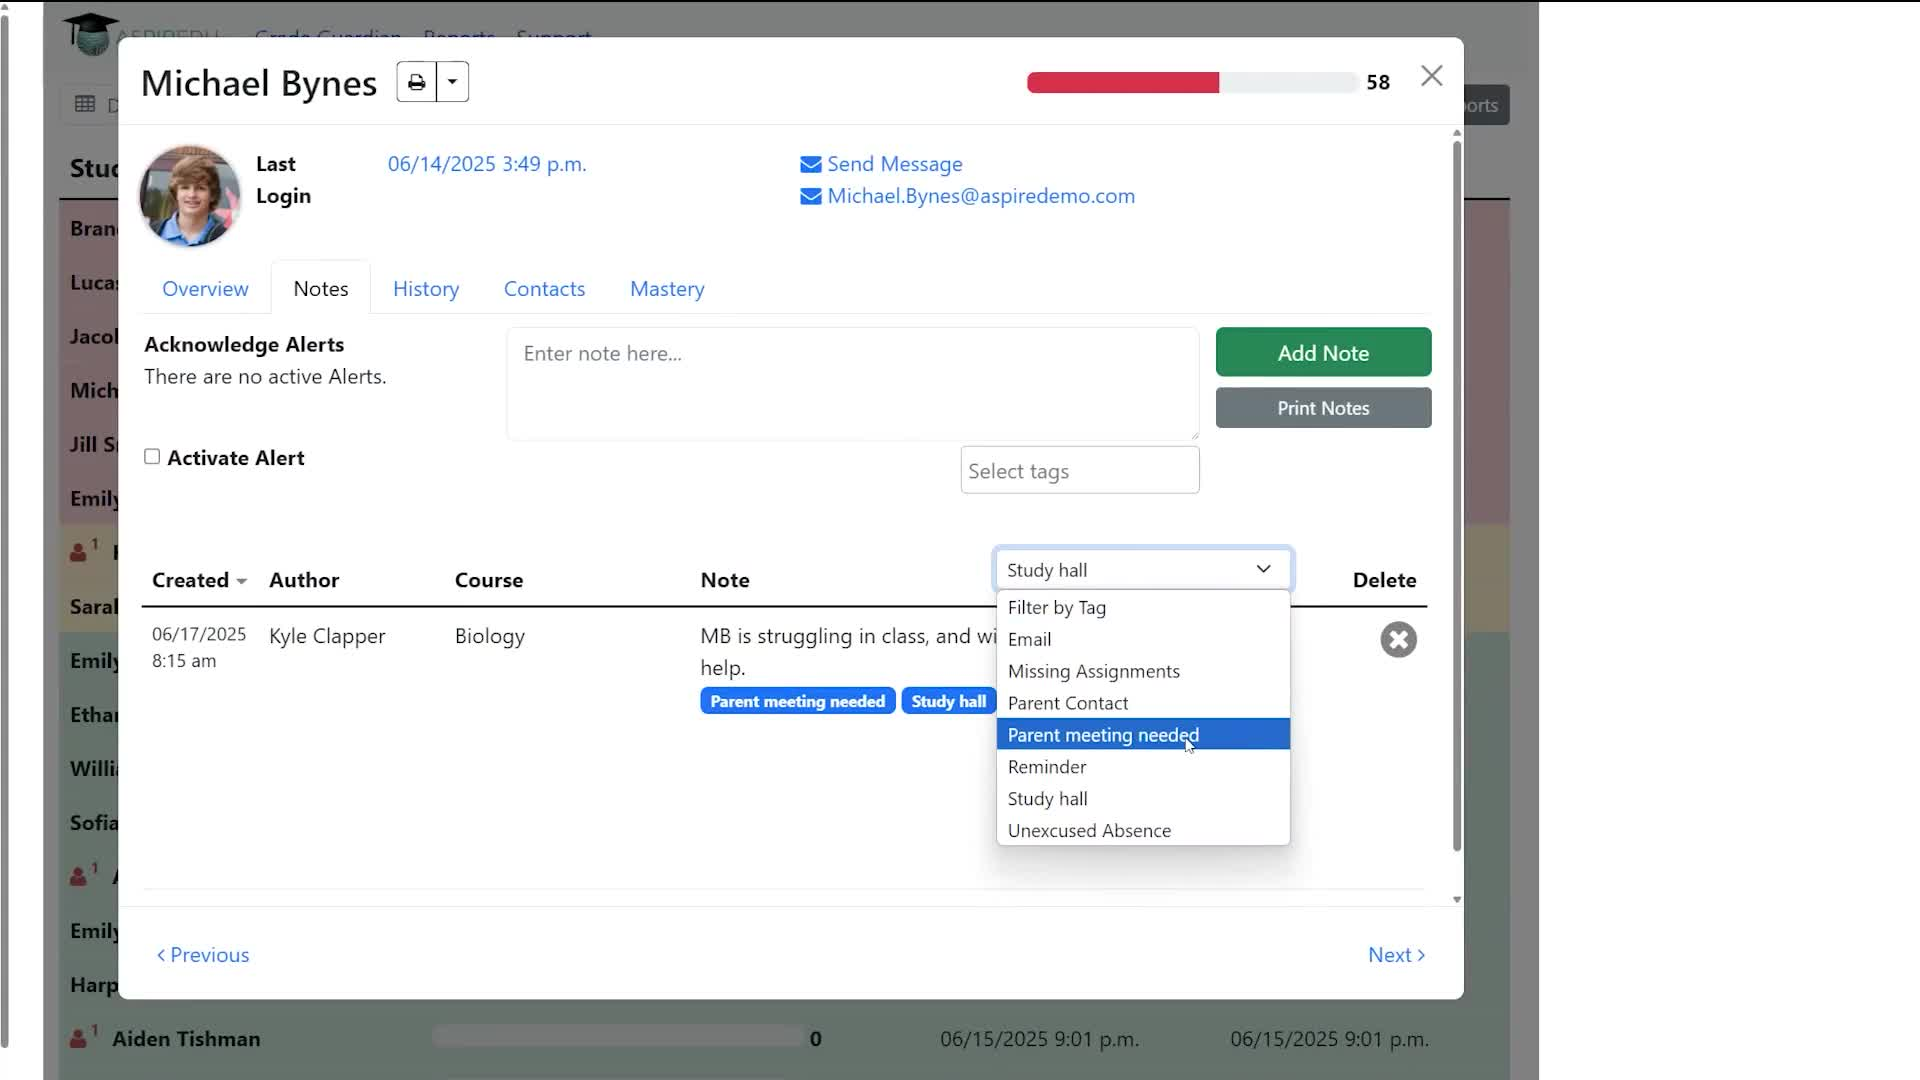
- To view notes associated with a specific tag, click on 'Filter by Tag'.
- Select the desired tag (e.g., 'Study Hall') to see all related notes.
Step 8: Sort Through Notes 1:50
- You can toggle between tags to sort through different notes as needed.
Step 9: Reach Out for Help 2:03
Cautionary Notes
- Ensure that you are using the correct tags to maintain organization.
- Double-check that the tags you assign are relevant to the note content.
Tips for Efficiency
- Administrators regularly review and update your tags to ensure they remain relevant.
- Use descriptive tags to make filtering easier in the future.
Need Help? Reach out to support@aspiredu.com.