
Student Messaging 🔗
Key Steps
1. Enable Permissions for Administrative Account 0:10
- Please make sure that the administrative account connected with the Canvas environment has the necessary permissions enabled.
- Grant:user:act-as permissions to allow account-level users to send messages to all students.
2. Grant User View List Permission 0:26
- Assign the user view list permission to users who will be sending messages.
3. Select Students to Message 1:00
- Choose to send an individual message or add students to a group message.
- Use the 'Add to group message' button to select multiple students.
4. Compose the Message 1:54
- Enter a subject line for the message (e.g., 'Missing Assignments').
- Write the message content (e.g., 'Please turn in all missing assignments').
5. Add Purpose Note 2:17
- Fill in the purpose section with notes that will not be displayed to the student but will be shared among users with access (e.g., 'Made an MBA aware of missing assignments').
6. Include Observers if Necessary 3:01
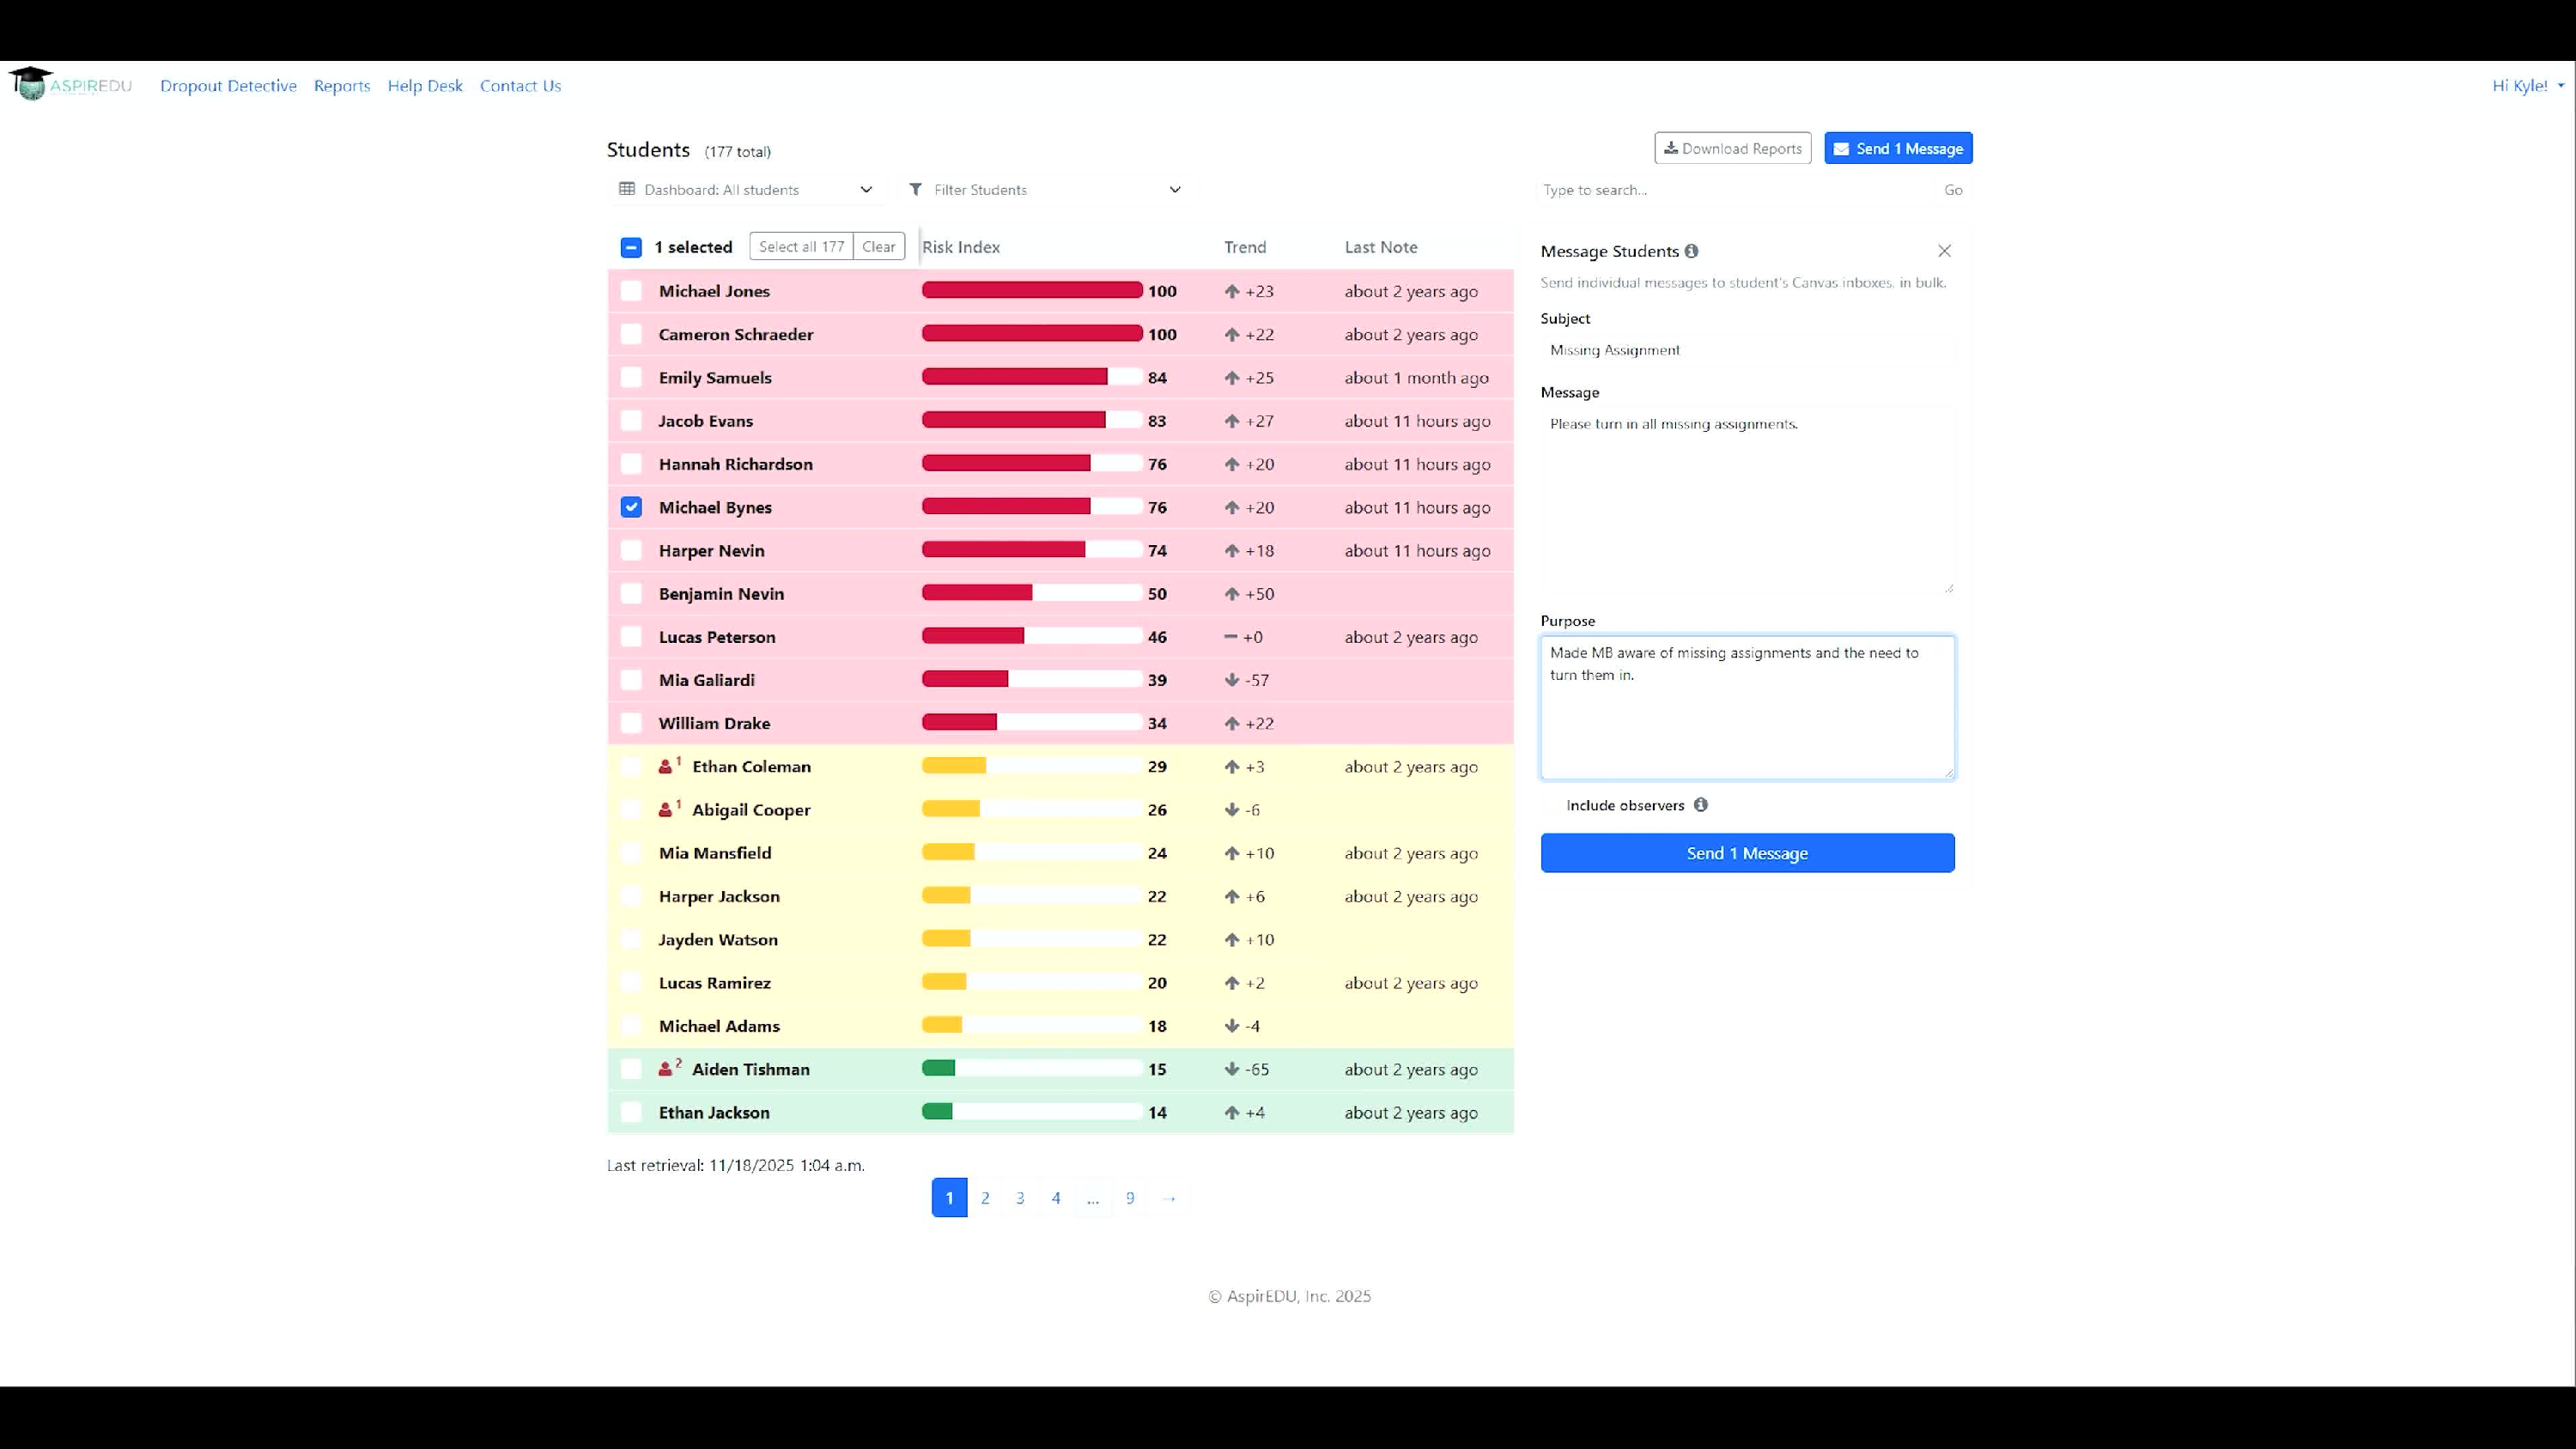
- Optionally include observers (e.g., parents) in the message.
7. Send the Message 3:09
- Click the 'Send Message' button to dispatch the message.
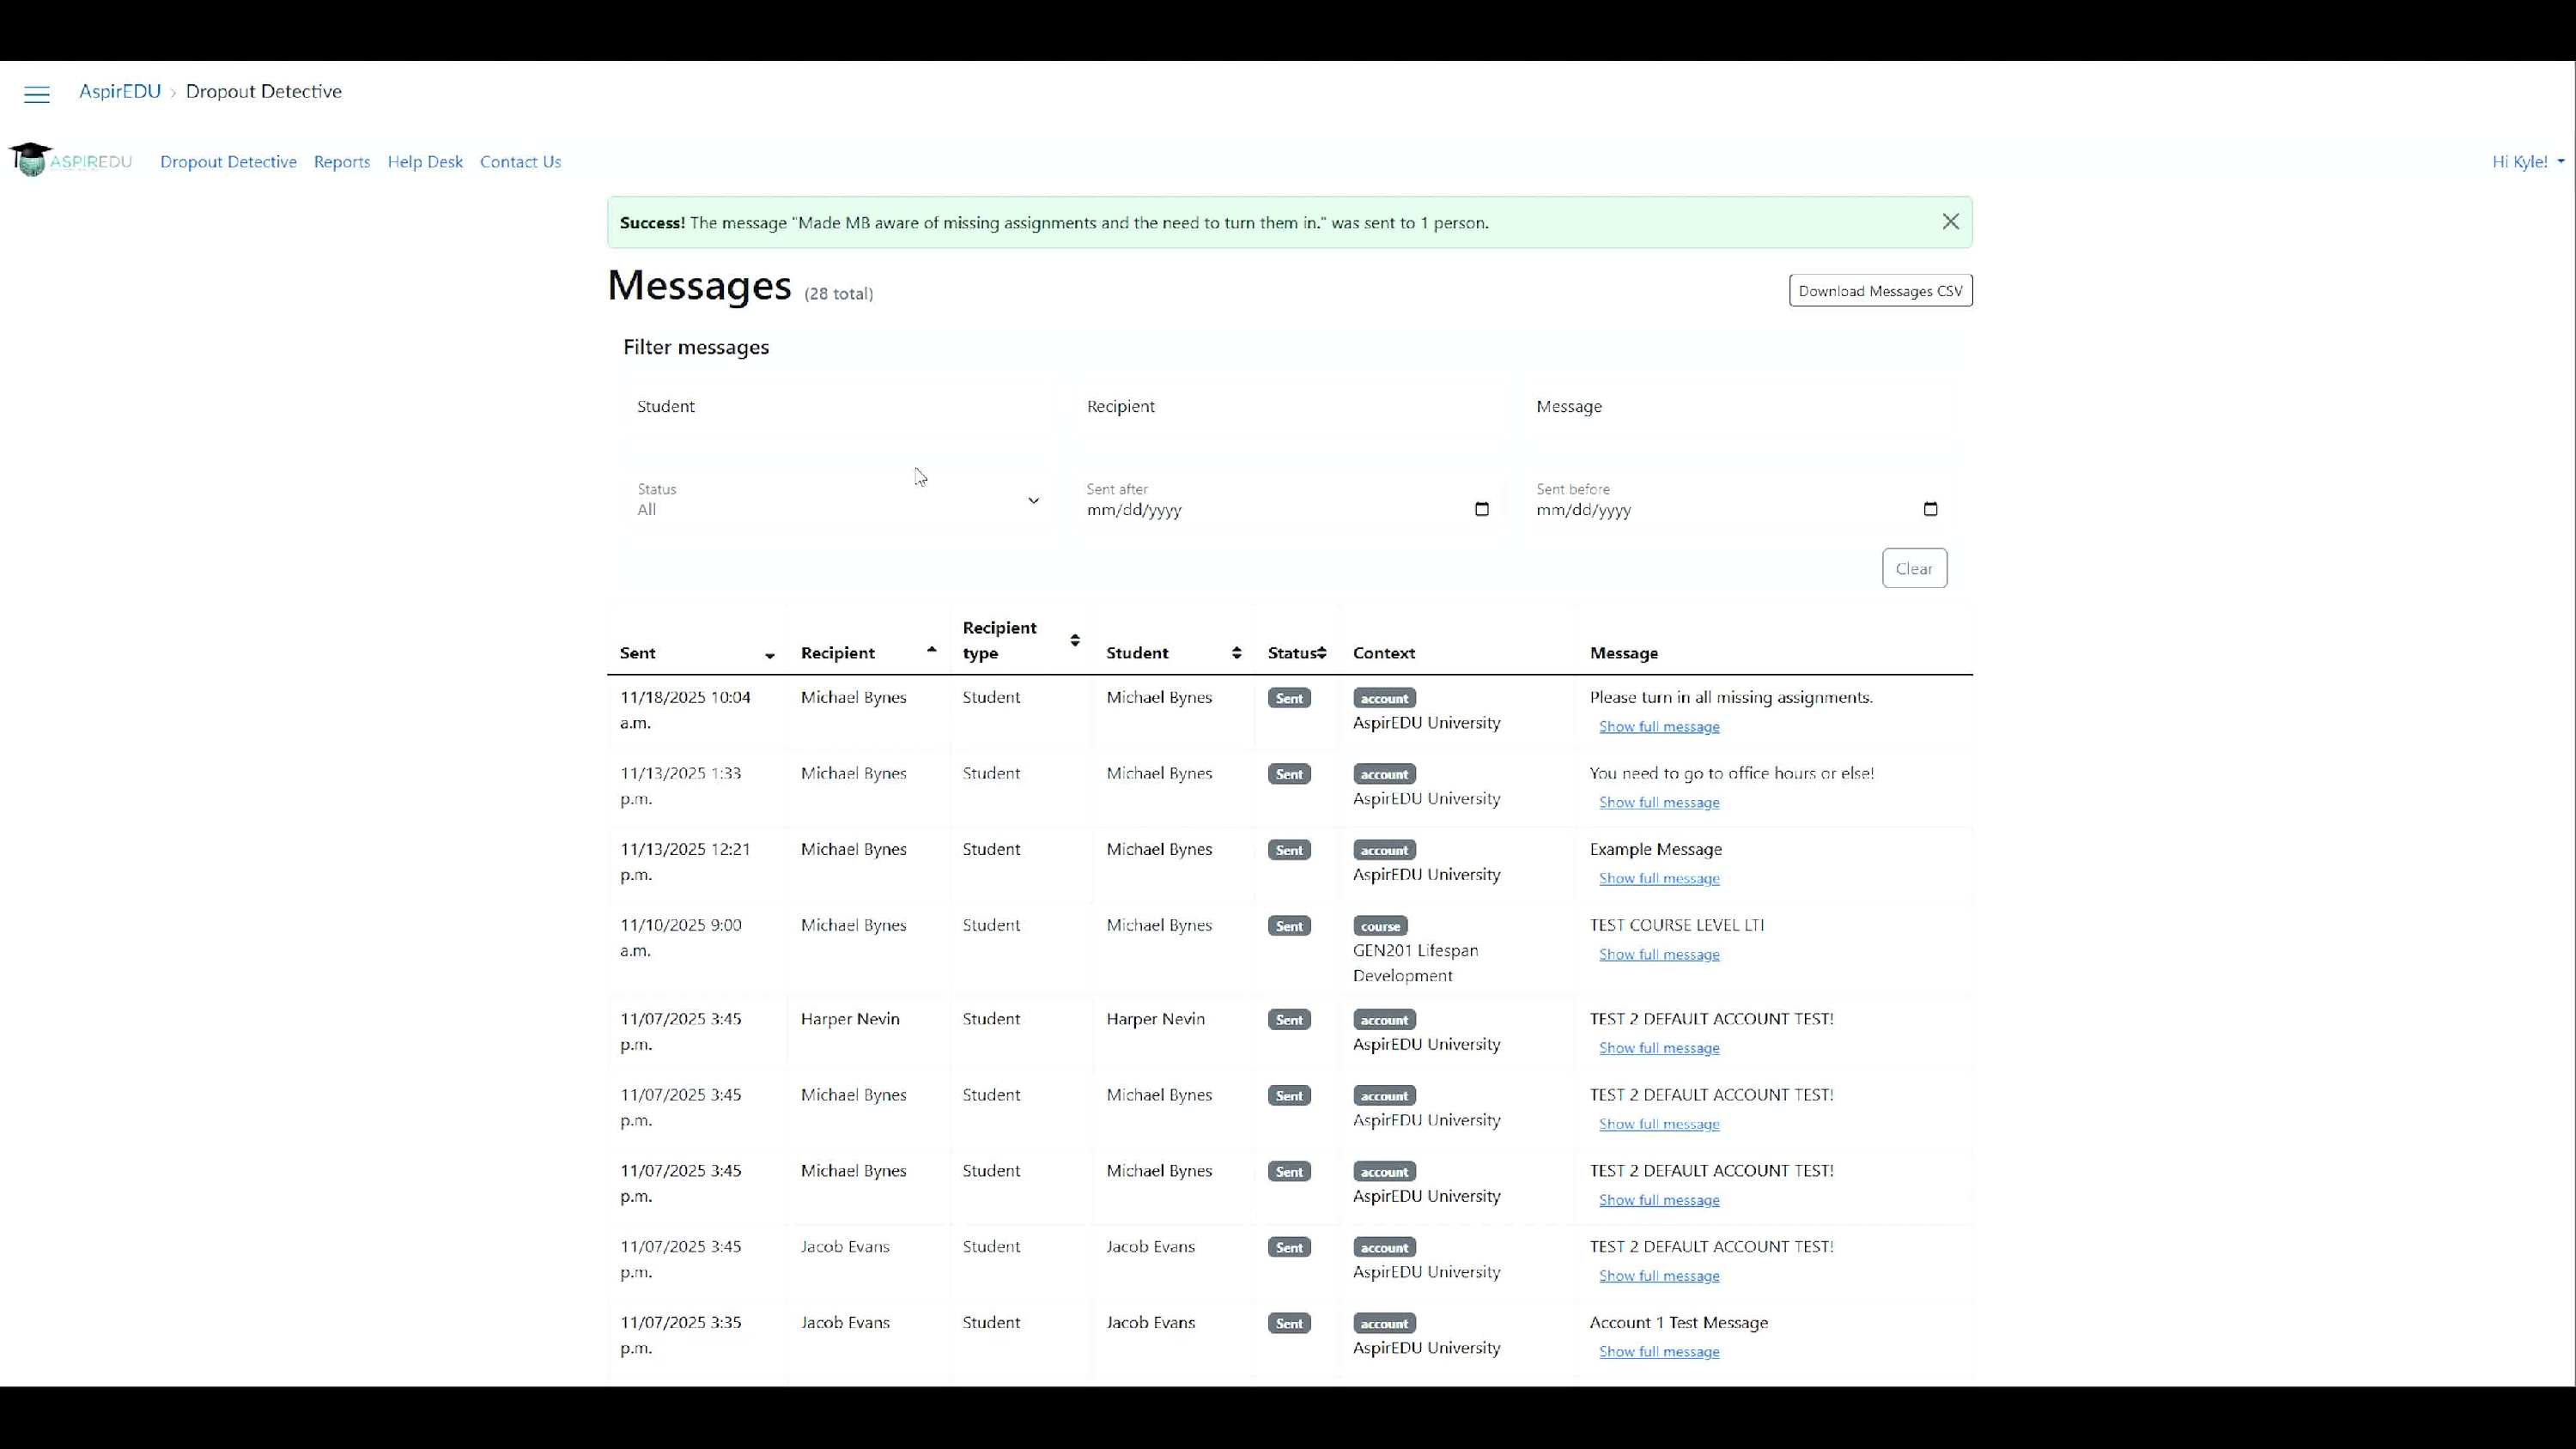
8. Access Sent Messages 3:32
- Navigate to the inbox to view sent messages and replies.
- Use the dropdown menu to select 'Sent' to see the list of messages.
9. Review Documentation of Sent Messages 4:04
- Click on the student’s name to view notes related to the sent message, including the author and purpose.
10. Search and Download Sent Messages 4:56
Cautionary Notes
- Ensure that all permissions are correctly set before attempting to send messages.
- Remember that the purpose notes are not visible to students or observers, so use them for internal communication only.
Tips for Efficiency
- Click on your name in the upper right corner to access 'Sent Messages'.
- Use search filters to find specific messages or download a CSV for detailed analysis.
Need Help? Reach out to support@aspiredu.com.